


The Ultimate Guide to Feature Prioritization for Product Success
Introduction
When designing a product or service, a good feature prioritization is a crucial step in meeting user needs and maximizing business value. By leveraging tools like the UX Canvas and effective prioritization diagrams, we can ensure that development efforts are aligned with both user objectives and business goals. Below, I break down the process of identifying user objectives, mapping features, and determining technical effort to create a Minimum Viable Product (MVP) that delivers the most value.
Understanding User Objectives and Features
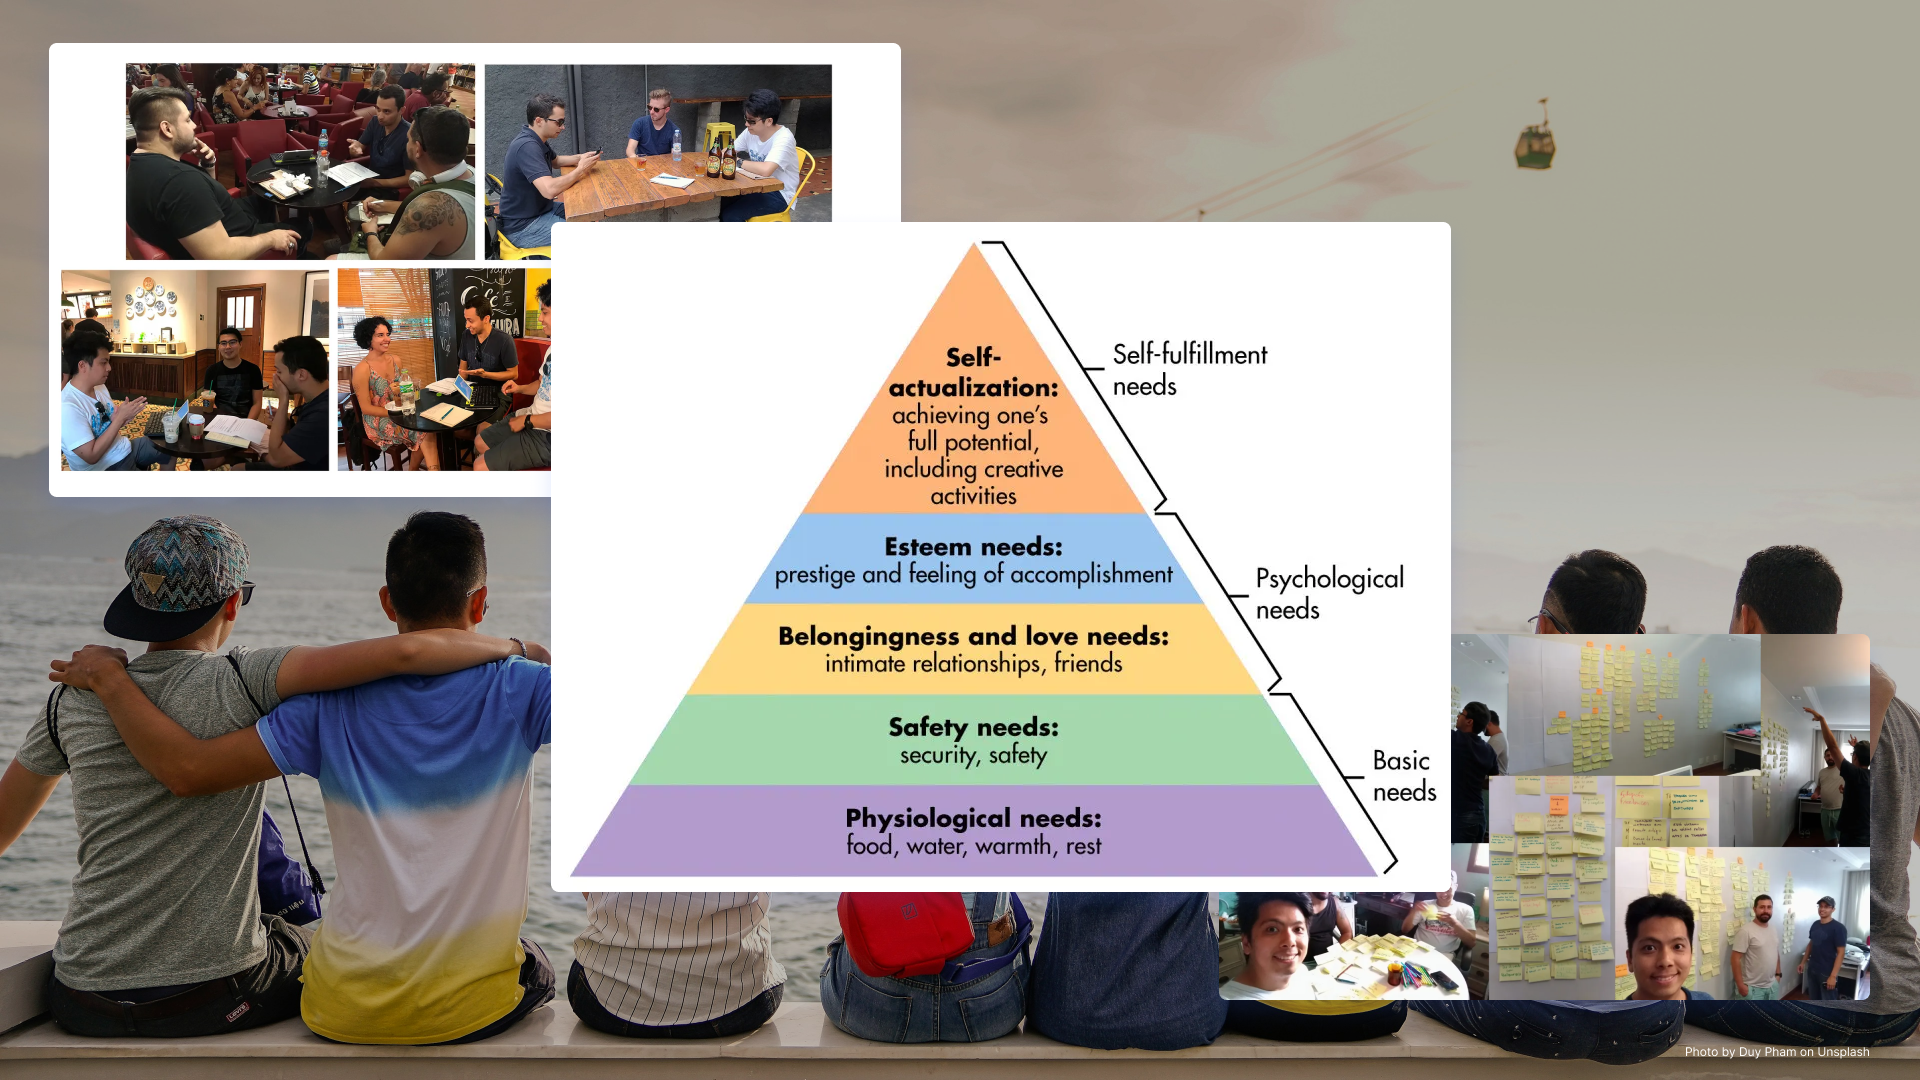
The first step in developing a user-centric product is to thoroughly understand the objectives users want to achieve when using your service. This can be done through an analysis of the UX Canvas, a tool that helps reveal user needs by breaking down different user interactions. These insights are then transformed into clear user objectives, which are critical for guiding the development process.
In this phase:
- Identify user objectives: Based on the UX Canvas, list the primary goals users aim to achieve when interacting with your product.
- Link objectives to features: For each objective, map the corresponding features that will help the user accomplish it.
The result of this process is a User Objectives and Features diagram, which visually represents the features needed to satisfy user needs. Here is an example for the Public Transit Ticket Refilling project.
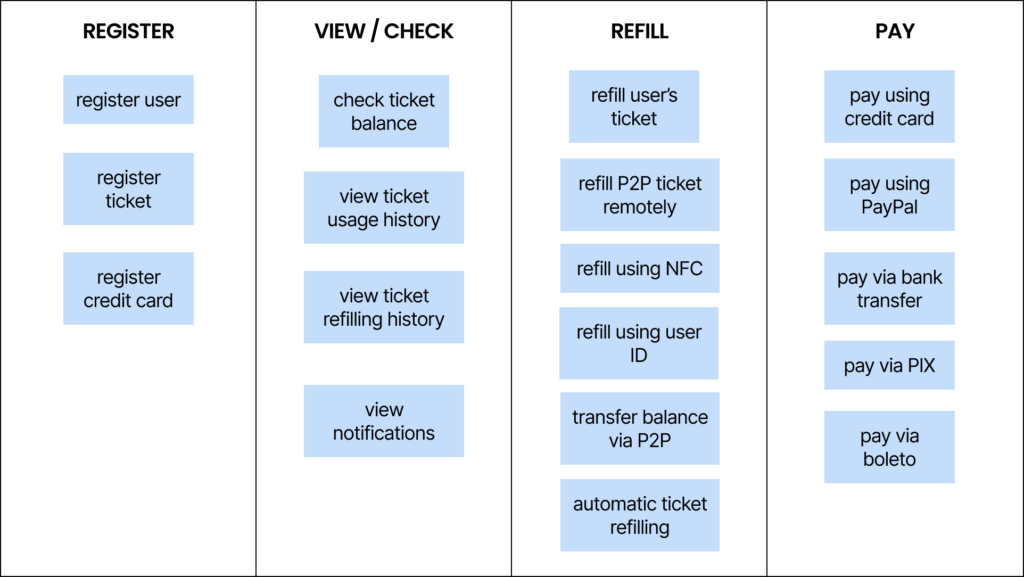
This diagram serves as a foundation for all subsequent decisions regarding the product’s development.
Balancing Business Value and Technical Effort
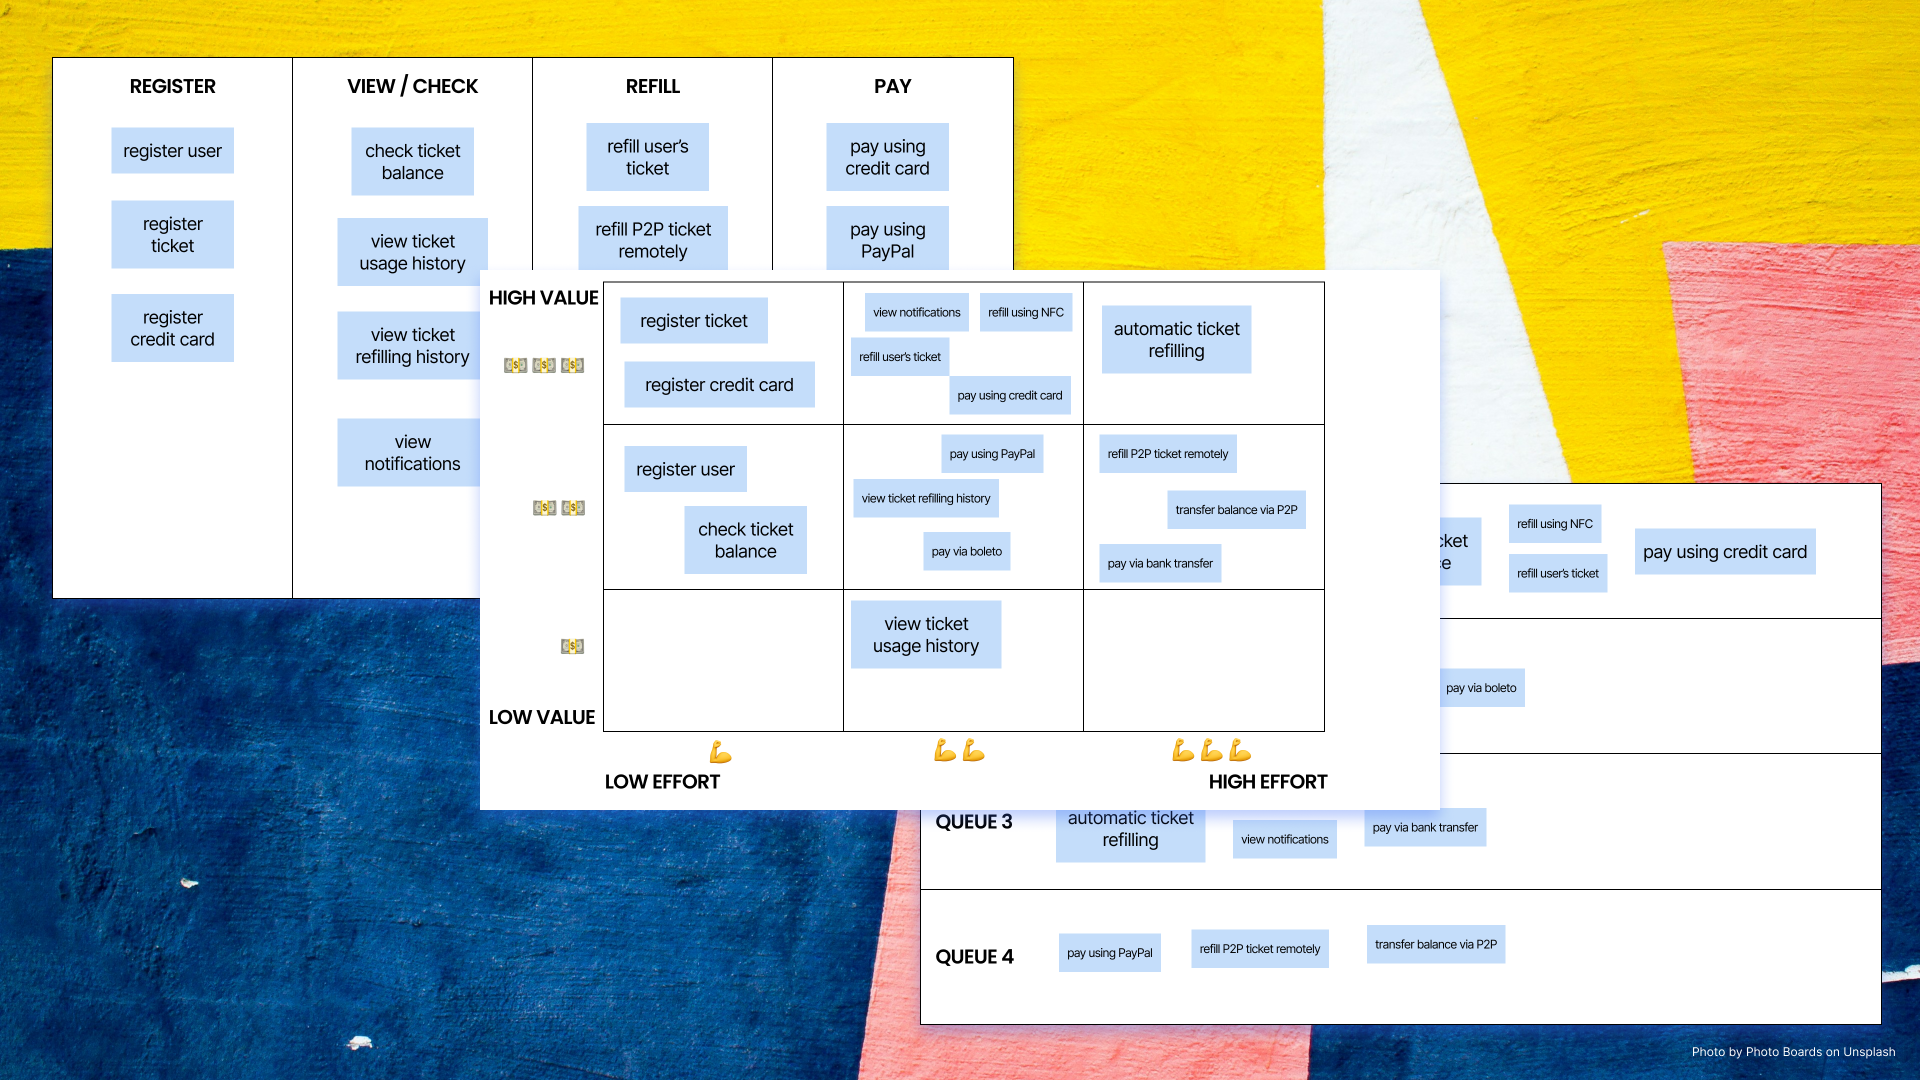
Once the objectives and features have been defined, the next step is to assess their business value in relation to the technical effort required to implement them. This is done by mapping features on a Business Value vs. Technical Effort diagram. Here is an example for the Public Transit Ticket Refilling project.

This diagram is highly beneficial because it offers a visual representation of the trade-offs between value and effort. You can easily identify:
- High-value, low-effort features that should be prioritized for quick wins.
- High-value, high-effort features that are essential but may require more resources.
- Low-value, low-effort features that could be included if resources allow.
- Low-value, high-effort features that may not be worth pursuing.
This mapping provides clarity on where to focus your efforts to ensure that you are delivering the most value for the least amount of technical investment.
Defining the MVP: Effort and Prioritization
The ultimate goal of feature prioritization is to define the features that should be included in the MVP. The MVP focuses on delivering the most critical functionalities that will address the core needs of users while also providing value to the business.
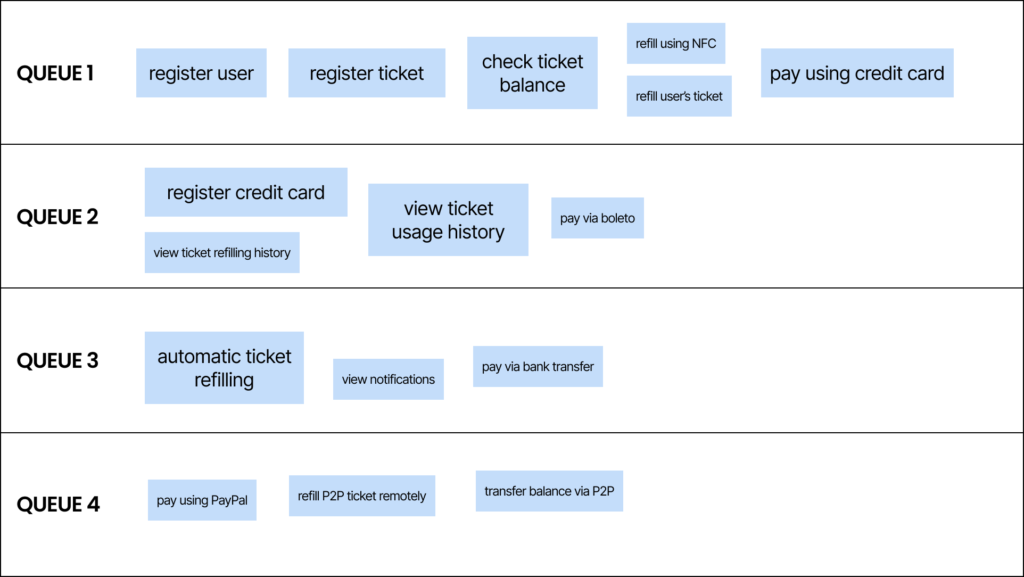
Based on the previous Business Value vs. Technical Effort diagram, you can organize features into prioritized development queues. In one example, features might be divided into four priority queues as follows:
- Queue 1: Business Value = 16; Technical Effort = 9
- Queue 2: Business Value = 8; Technical Effort = 7
- Queue 3: Business Value = 8; Technical Effort = 8
- Queue 4: Business Value = 6; Technical Effort = 8
By analyzing these numbers, the MVP should contain the features from Queue 1, as they represent the highest value relative to effort. Each subsequent queue will then be tackled based on available resources and project scope.
Key considerations:
- Maintain a balance between business value and technical effort in each development queue.
- Ensure the MVP includes essential features that meet the user’s core objectives.
- Tailor the approach based on your project’s specific context, as each product may have different priorities and resource allocations.
Flexibility in Diagram Usage
While this approach provides a structured way to prioritize features, it’s important to note that there is no fixed rule for how diagrams should be used in every project. Each project has its own unique needs, resources, and goals, so it’s essential to adapt the diagrams based on the context.
What works for one project may not necessarily apply to another. Therefore, the diagrams should be viewed as flexible tools rather than rigid frameworks. The ultimate aim is to ensure that user needs are met, business objectives are achieved, and resources are allocated efficiently.
Conclusion
Prioritizing features in UX design is not just about selecting what should be built first but ensuring that these decisions are based on real user needs and aligned with business goals. By following the steps outlined—understanding user objectives, mapping features, assessing business value versus technical effort, and defining the MVP—you’ll be able to develop a product that balances value and effort effectively.
This method provides a user-focused approach to feature prioritization that ensures the right features are developed at the right time. Remember, flexibility and adaptability in your approach will ultimately guide the success of your project.